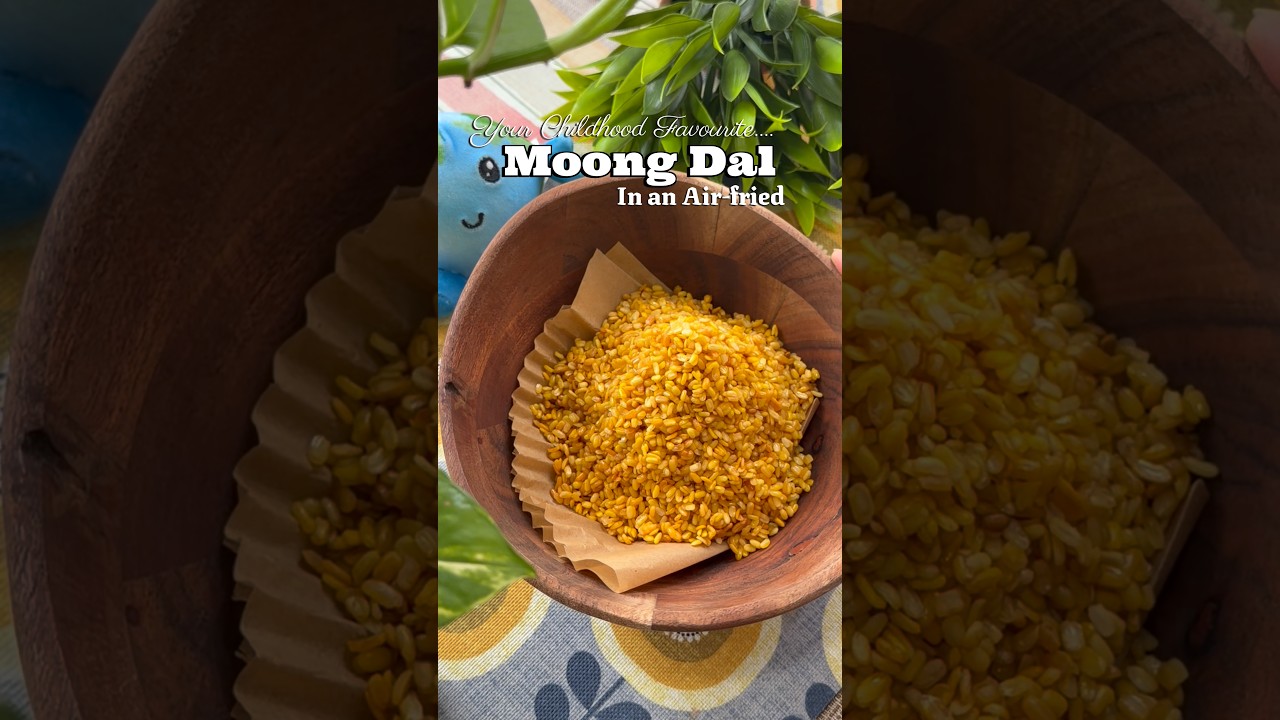
बचपन से बाजार वाली कुरकुरी मूंग दाल मेरी फेवरेट रही है! 😍 लेकिन मुझे यकीन ही नहीं हो रहा कि वही Crispy Moong Dal Namkeen अब घर पर इतनी आसानी से बन सकती है! वो भी Air Fryer में, बिना डीप फ्राई किए! 🔥
If you love market-style Moong Dal Namkeen, this Crispy Healthy Air Fryer Moong Dal Recipe is a must-try! Golden, crunchy, delicious, and made with just a few simple ingredients. Perfect for evening tea-time snacks, movie nights, or whenever you’re craving something crispy and savory!
No deep frying, no complicated ingredients — just homemade crispy goodness! 💛
📌INGREDIENTS:—
* ½ cup Yellow Moong Dal (Split Yellow Lentils)
* 2–3 tsp Olive Oil / Ghee / Sunflower Oil
* ¼ tsp Salt (or as per taste)
* Water for soaking and boiling
📌METHODS:—
Step 1: Wash ½ cup moong dal thoroughly and soak it in water for 1 hour.
Step 2: Bring water to a boil. Add the soaked moong dal and boil for 8–10 minutes, until cooked but still holding its shape.
Step 3: Strain the water completely and gently spread the cooked moong dal on a clean kitchen towel. Be careful not to break the dal.
Step 4: Let it air-dry for approximately 1 hour, or place it under a fan for quicker drying. Make sure the dal is well-dried before air frying.
Step 5: Transfer the dried moong dal into a bowl. Add 2–3 tsp olive oil, ghee, or sunflower oil and salt. Gently mix to coat evenly.
Step 6: Preheat your air fryer. Spread the moong dal evenly in the basket and air fry at 340–400°F (170–200°C), depending on your air fryer, for approximately 20–25 minutes.
Step 7: Stir after the first 7–9 minutes, then every 4–5 minutes to ensure even crisping and prevent burning around the edges.
Step 8: Once golden and crispy, let the moong dal cool completely. Store in an airtight container and enjoy your homemade crunchy snack!
💡 IMPORTANT TIPS:
✅ Dry the boiled dal properly before air frying for better crispiness.
✅ Handle the cooked dal gently so it doesn’t break.
✅ Watch carefully while air frying because cooking times vary by appliance. Start at a lower temperature if your air fryer browns food quickly.
✅ Allow the namkeen to cool completely before storing to preserve its crunch.
💛 WHY YOU’LL LOVE THIS RECIPE:
✔ No deep frying required
✔ Made with simple pantry ingredients
✔ Homemade alternative to packaged namkeen
✔ Delicious, crunchy and satisfying
✔ Perfect tea-time and evening snack
❤️ LOVE CRISPY HOMEMADE SNACKS?
👍 LIKE this video if you love market-style Moong Dal Namkeen!
💬 COMMENT below — Have you ever tried making Moong Dal Namkeen at home?
📌 SAVE this recipe so you can make it whenever those crunchy snack cravings hit!
↗️ SHARE it with your family and friends who love namkeen!
🔔 SUBSCRIBE to What I Cook at Home by Ankita for more easy, delicious, and homemade Indian recipes!
Crispy Moong Dal Recipe, Air Fryer Moong Dal, Moong Dal Namkeen Recipe, Healthy Moong Dal Namkeen, Homemade Moong Dal Namkeen, Market Style Moong Dal, Haldiram Style Moong Dal, Moong Dal Fry Recipe, Crispy Moong Dal Namkeen, Air Fryer Indian Snacks, Healthy Air Fryer Snacks, No Deep Fry Snacks, Moong Dal Snacks Recipe, Yellow Moong Dal Recipe, Easy Indian Snacks Recipe, Tea Time Snacks Indian, Evening Snacks Recipe, Healthy Namkeen Recipe, Homemade Namkeen Recipe, Crunchy Moong Dal, Low Oil Snacks Recipe, Air Fryer Recipes Indian, Crispy Dal Namkeen, Moong Dal Fry in Air Fryer, Healthy Snacks at Home, Namkeen Recipe Without Deep Frying, Easy Diwali Snacks Recipe, Protein Rich Indian Snacks
#MoongDalNamkeen #AirFryerRecipes #HealthySnacks #CrispyMoongDal #homemadenamkeen
Más sobre बाजार जैसी Crispy Moong Dal Namkeen घर पर! 😍🔥 | Air Fryer Moong Dal Recipe | No Deep Frying
बाजार जैसी Crispy Moong Dal Namkeen घर पर! 😍🔥 | Air Fryer Moong Dal Recipe | No Deep Frying
अगर आपको बाजार जैसी Moong Dal Namkeen पसंद है, तो यह Crispy Healthy Air Fryer Moong Dal Recipe एक आवश्यक कोशिश है! सुनहरी, कुरकुरी, स्वादिष्ट, और कुछ ही साधारण सामग्रियों से बनाई गई। शाम के चाय के समय के स्नैक्स, मूवी नाइट्स, या जब भी आप कुछ कुरकुरा और मसालेदार खाने का मन करे, तो यह आदर्श है!
कोई डीप फ्राई नहीं, कोई पेचीदा सामग्रियाँ नहीं — बस घर पर बना कुरकुरा स्वाद! 💛
सामग्रियाँ:—
- ½ कप पीली मूंग दाल (स्प्लिट पीले दाल)
- 2–3 चमच ऑलिव आयल / घी / सनफ्लावर आयल
- ¼ चमच नमक (स्वाद के अनुसार)
- भिगोने और उबालने के लिए पानी
तरीके:—
- चरण 1: ½ कप मूंग दाल को अच्छे से धो और 1 घंटे के लिए पानी में भिगो दें।
- चरण 2: पानी को उबालें। भिगी हुई मूंग दाल डालें और 8–10 मिनट तक उबालें, जब तक पक जाए लेकिन अभी भी अपनी आकृति बनाए रखे।
- चरण 3: पानी को पूरी तरह छान लें और पकी हुई मूंग दाल को ध्यानपूर्वक किचन टॉवेल पर फैला दें। ध्यान दें कि दाल न टूटे।
- चरण 4: इसे एयर-ड्राई करने दें लगभग 1 घंटे के लिए, या जल्दी सुखाने के लिए फैन के नीचे रखें। सुनिश्चित करें कि दाल ठीक से सुखी हो जाए एयर फ्राइंग से पहले।
- चरण 5: सुखी हुई मूंग दाल को एक कटोरे में ट्रांसफर करें। 2–3 चमच ऑलिव आयल, घी, या सनफ्लावर आयल और नमक डालें। हल्के हाथ से अच्छे से मिलाएं।
- चरण 6: अपने एयर फ्रायर को पूर्व गरम करें। डाल को बास्केट में बराबर रूप से फैलाएं और 340–400°F (170–200°C) पर एयर फ्राई करें, आपके एयर फ्रायर पर निर्भर करके लगभग 20–25 मिनट।
- चरण 7: पहले 7–9 मिनट के बाद चलाएं, फिर हर 4–5 मिनटों के बाद चलाते रहें ताकि समान तरीके से कुरकुरा हो और किनारों पर जलन न हो।
- चरण 8: जब सोने के रंग और कुरकुरा हो जाए, तो मूंग दाल को पूरी तरह से ठंडे होने दें। एक संधानी दब्बे में संभालें और अपने घर के कुरकुरे स्नैक का आनंद लें!